Thursday, October 14, 2010

Sunday, September 12, 2010

Annie's room

While my girl's were away at YW camp this summer, I finished up a few projects and fixed up their rooms. Here's Annie's.


The pinboard that I made way back when.


I think she needs a full length mirror on that bit of wall.


This wall art is another easy project that I've been meaning to show. Maybe later.


Dresser from IKEA.
And remember our super easy paint idea?


Cute tissue paper lantern. We just cut out circles of tissue paper and glued them onto an IKEA light fixture.


I love this room! I hope she does, too!

Saturday, July 24, 2010

lampshade slipcover

i found these really cool lamps at Home Goods, but i really don't like the shades at all. they are cheapo faux silk, and the shiny pearly color doesn't do much for me, either.


so, i remembered reading about how Chris over at Just Beachy had made a slipcover for a lampshade, and decided to try it out!


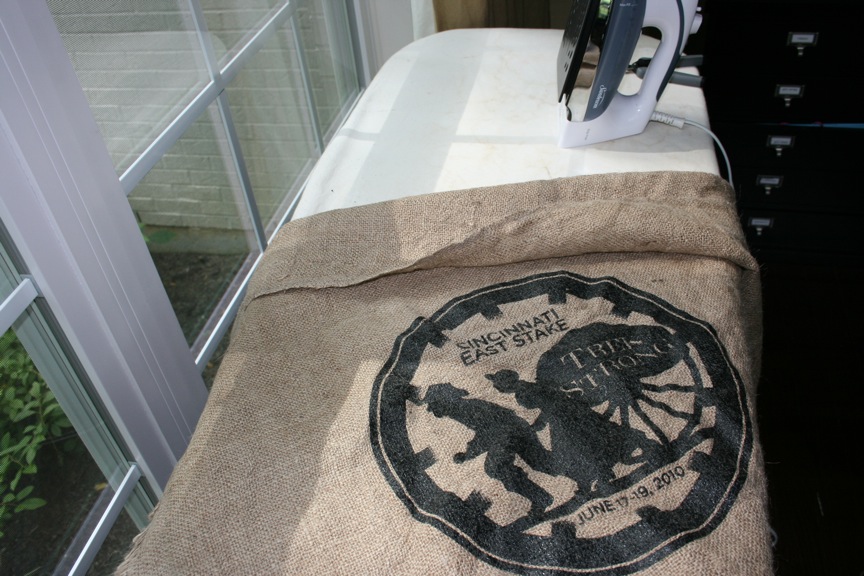
i used the burlap from Erin's trek bag. it was the perfect color and texture.


i love the contrast between the rough burlap and the mercury glass lamp.


it brings some of the darker wood tone from the piano into that side of the room. (burlap is very stretchy and ravelly, by the way, i think next time i might use linen.)

Thursday, July 22, 2010

Disaster strikes . . .

I took some pictures of my very clean house a few months ago when I thought we might be moving. I am using these pictures now as a reference so you can see what my office once looked like.


The perfect craft room solution - shallow drawers and cute cabinets on top, with cute IKEA fabric in the windows to hide the messy shelves. It only took me over a year to find these.


My "office" made out of a closet. Originally I was planning to "paper" the inside of this closet with the IKEA fabric featured above.


My desk/worktable. I love it pushed up against the window so that I can see outside while I'm working.


This is what my office looks like now. I went to put away a few things left out from my week's projects, and I found that a gallon jug of distilled water (for ironing) had sprung a leak and soaked everything on that shelf and below. (This is not the first time distilled water has leaked in my house - last year I found a jug that had seeped on a shelf in my pantry, only that one wasn't discovered for months.)


Books, magazines, etc. from the shelf above.


Around here, you have to dry stuff out really well, or it will grow mold. The water seeped into the bottom shelf where it had puddled. I hope I can dry it out so it doesn't warp.


I save my fave magazine articles with pictures of pretty houses. These were not put away the last time I looked through them, or they would have been in the other cabinet and been fine. They are spread out all over the room drying separately so they don't stick together.


I'm trying to salvage the fabric that was inside on the back of the cabinet. I didn't see it when I was at IKEA today, which makes me think they don't sell it anymore, and I really like it.


This isn't really what I wanted to do with my evening, I was going to finish up some projects for the girls' rooms (pictures coming soon!) and clean the house before my sweetie gets home. Oh well, I'm just glad I found it today instead of in a few weeks.


Wednesday, July 21, 2010

easy project

i found these great pinboards at the Pottery Barn Outlet (they're from West Elm) for only about $15 each and turned them into ......


.....THESE!


amy butler fabric, but of course


the plan is to get them hung and the girls' rooms picture perfect before they get home from camp tomorrow.

Thursday, June 3, 2010

pretty in pink


i had several rooms in the house painted last week. bob did a great job, for a great price. a and i had talked about how we could make the space more neutral, but still keep a little bit of the salmon pink colored texture on the walls. this is what we came up with:

i cut flower shapes out of contact paper in varying sizes with my Cricut. then, i peeled off the back and put them randomly on the pink walls.


i had to hurry because bob was ready to paint.


i made sure the edges were all smoothed down with no air bubbles for paint to seep in.


then bob painted 2 coats over the top of the contact paper flowers.


and i went upstairs and peeled the stickers off of the walls.


i love that you can still see the dragged texture.


it looks so much better! a loves it! it was the easiest painting project i've ever not done!

(pictures of the finished room coming soon!)

Tuesday, May 18, 2010

lego my messy legos

I wrote this post a few weeks ago, knowing I would be too busy to blog for awhile. The table's been finished for almost a month now, and we are still loving it!


if you have boys, then you know what i'm talking about. legos have taken over our lives here. my 8 year old son LOVES them, asks for them for every birthday/christmas. the problem is, with so many different sets, how do you find the teeny tiny specific piece that you need when making a particular project?

you dump out all 240,000 legos all over the carpet in your bedroom and dig through them. then when your mommy comes in and says it's time to pick up and get ready for bed, you cry because you just spent the last 6 hours hunting for that piece and still didn't find it, and now you have to pick them all up and start over tomorrow.

my kids may tell you differently, but i really am a compassionate person. i TOTALLY understand the frustration of not being able to find something when you need it. believe me, a good portion of my childhood was spent searching for things and then giving up on whatever game/craft/school project i was working on because our house was a black hole.

this boy is so creative and i don't want him to give up on that. coming up with a lego solution was on the list, but lots of other things were coming first, until my friend Kathleen needed to go to IKEA and even though i didn't need to, i went along (because i can always find something to buy at IKEA) so the project began, even though it was probably not as urgent as some other things on the list.

here's how we did it:

i bought two TROFAST units in pine and primed them.


eric and i went to Lowes' and got some 1/2 inch MDF and 3x1 birch boards, and built a top for the tables.


then we painted the TROFAST units black using a gloss latex enamel and a sponge roller (and lots of Flotrol)

two coats


he spray-painted the table top - it needs to be a bit more durable.


we sorted all of the legos by color, as well as people and wheels, and any other categories that make sense to the kids. (there is room for 18 small bins)


Eric went to the Lego store and got some of the flat gray base pieces. he was going to glue them down, but then we wouldn't be able to use the table for games or other stuff, so they are just sitting on top.


i made some labels using clip art from Just Something I Made, cut them out and taped them on with packing tape.

the kids were thrilled, and I love that the legos get put away! there is a huge resurgence of creative building in our house thanks to this simple and awesome organizing tool!